We’ve all been there. You set up a print, walk away, and dream of perfect layers. But sometimes, the 3D printing gods have other plans.
Recently, I was tasked with printing a batch of tiny, highly detailed miniature bows (of the bow-and-arrow variety) for some local Girl Scout crafts. I needed 220 of them in total, which meant running dense sheets of 44 bows at a time.
With a tight deadline looming, I kicked off the first run. What happened next was a classic, gold-standard 3D printing disaster.
The Overnight “Spaghetti Monster” (And Worse)
I woke up the next morning to a completely bare print bed and a pile of plastic tumbleweeds.
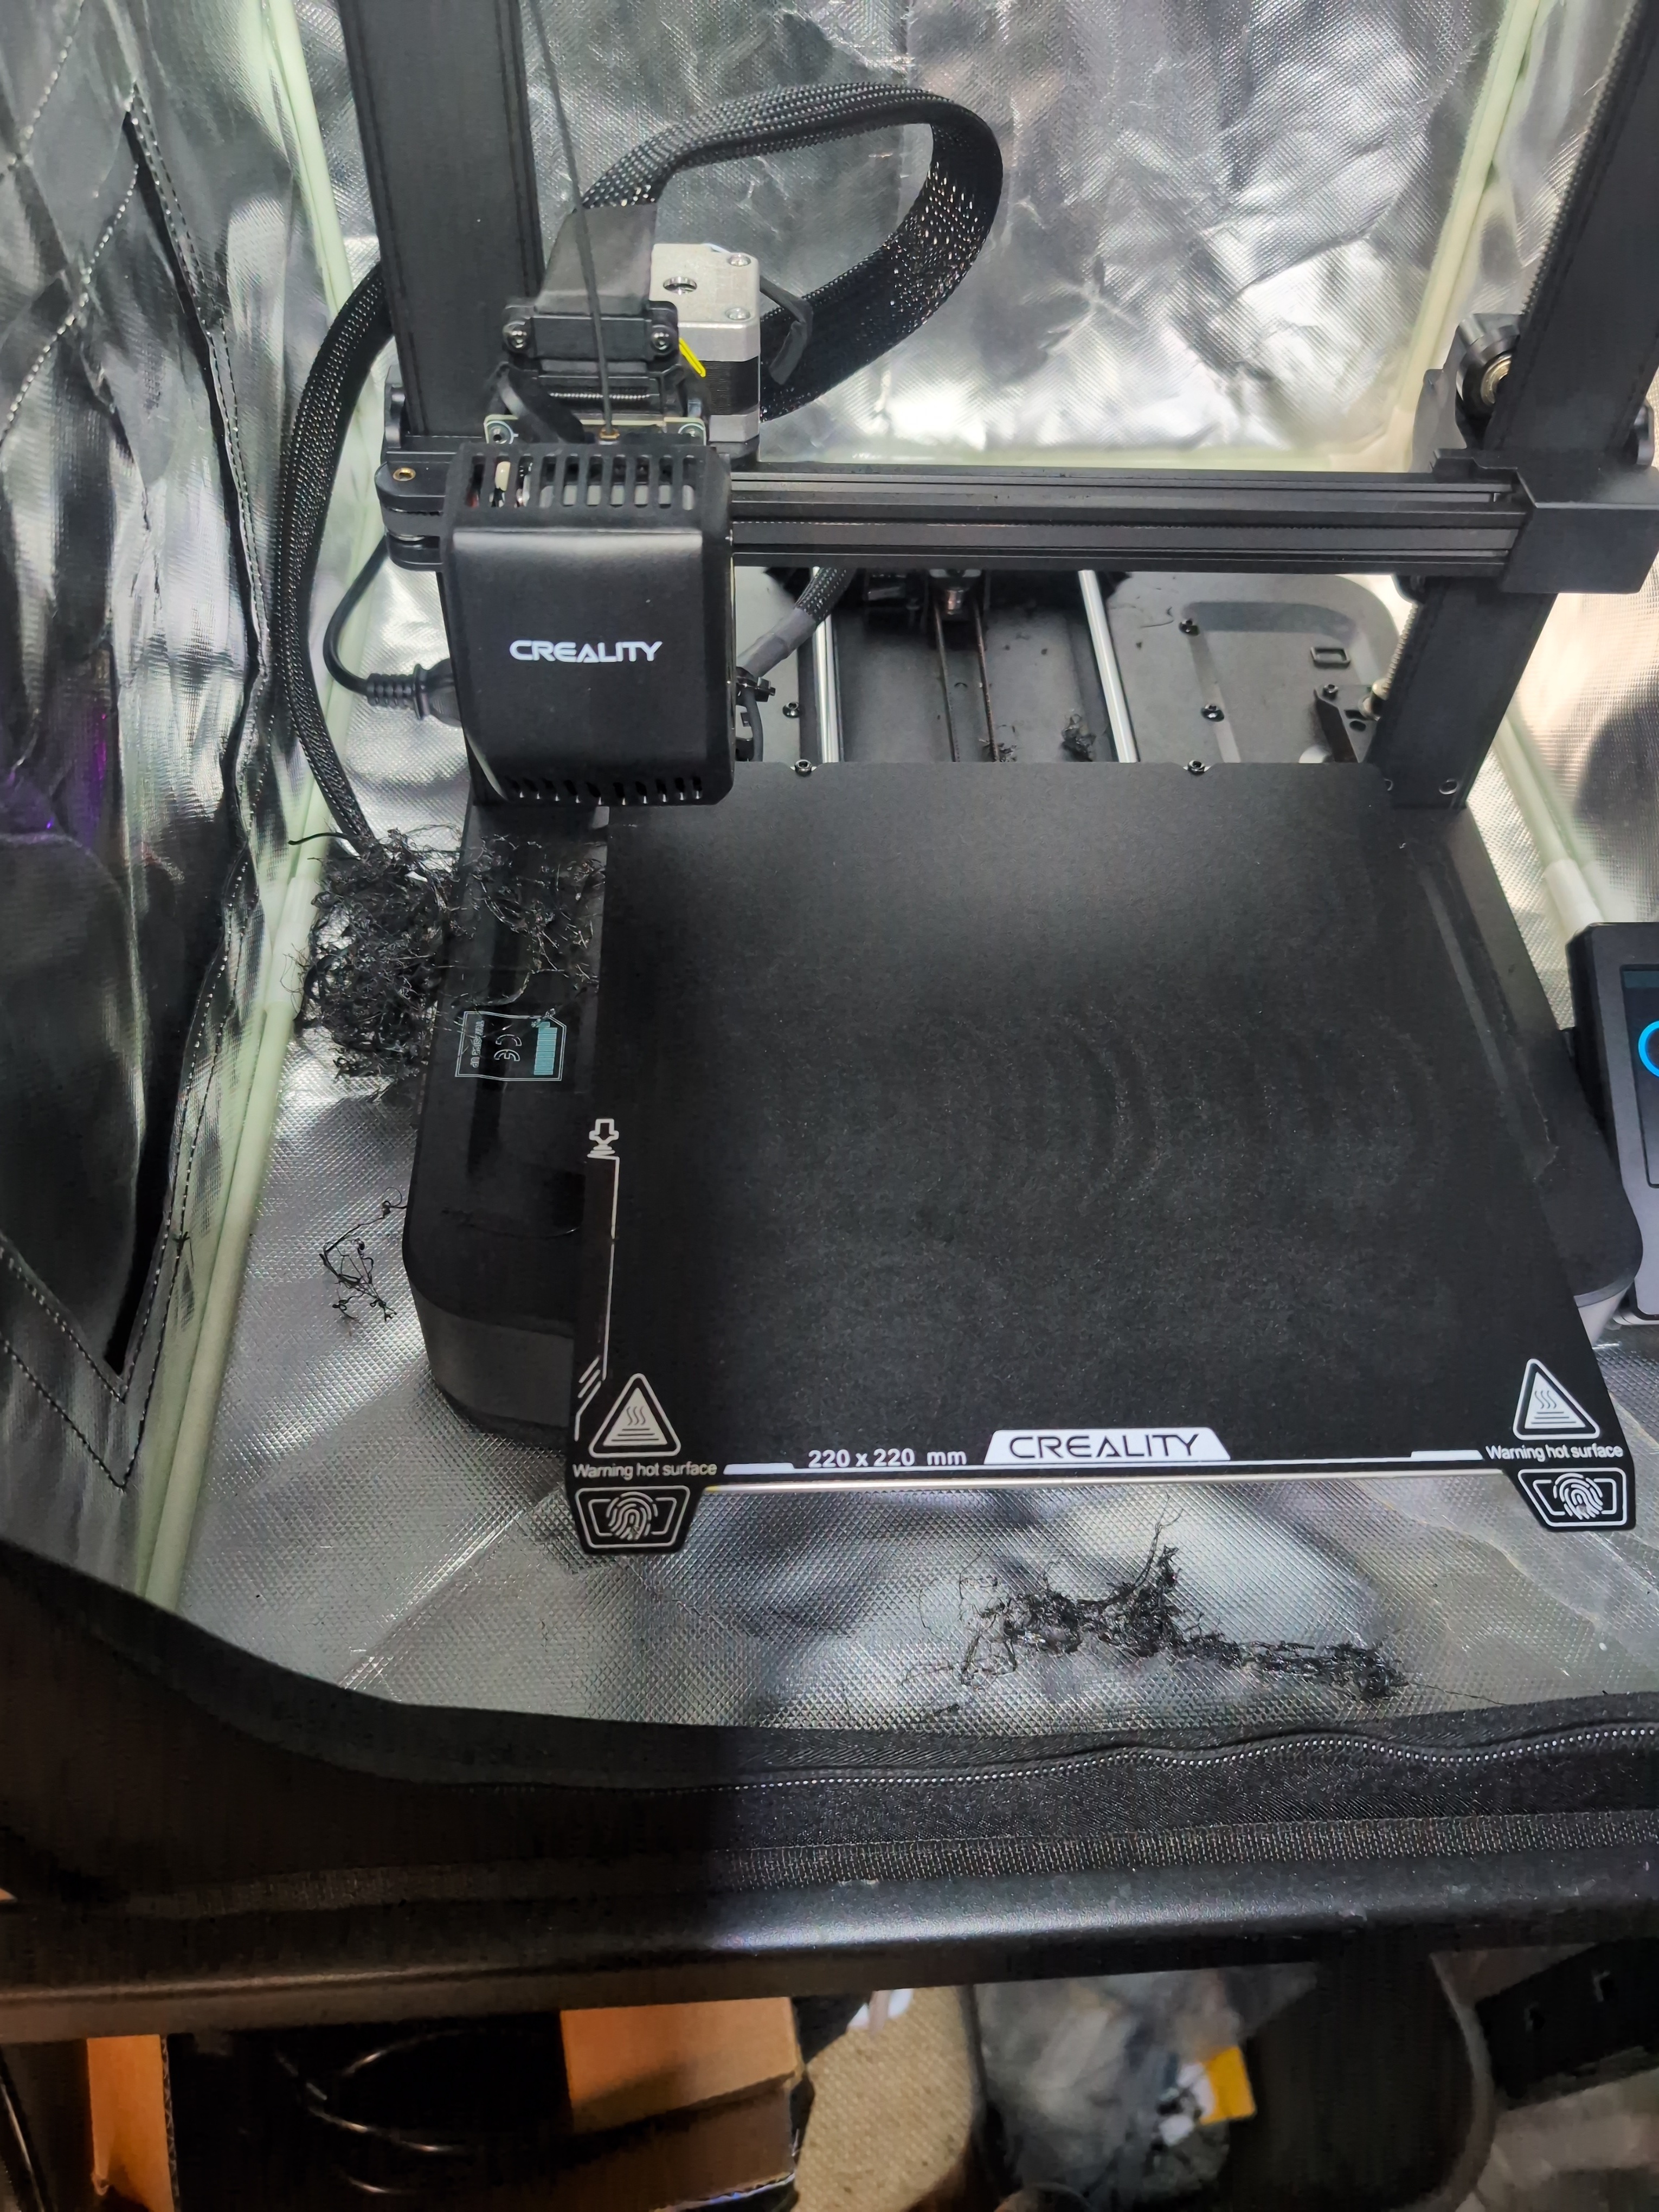
Unfortunately, the damage didn’t stop at the bed. Because the tiny, thin parts had curled up and detached, the print head had spent hours bulldozing the loose PLA. Molten plastic had climbed up, completely consuming the heat block, standard mounting bracket, and encasing the wiring right up to the breakout board on my Ender 3 V3 SE.
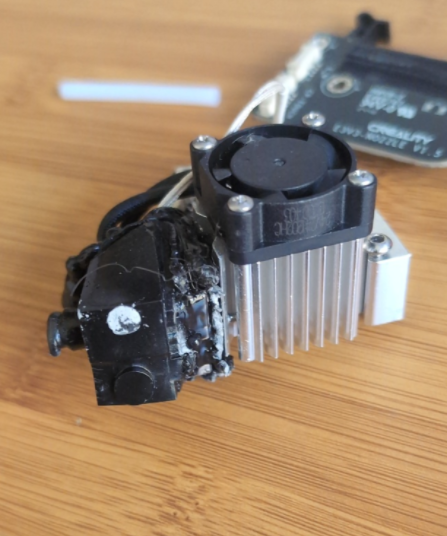
The toolhead was completely hosed. Trying to salvage it with a heat gun would have meant fighting a losing battle against melted plastic and fragile, ruined thermistor wires. The only sane option was to declare the hotend a total loss, order a replacement kit, and prep for a complete swap.
The Rebuild and the Rescue Plan
Thankfully, the silver lining of the Ender 3 V3 SE is how modular it is. I sourced a direct OEM replacement hotend kit, scavenged my original cooling fans, and got to work.
During the reassembly, I encountered a stubborn white JST connector for the heater cartridge that absolutely refused to release from the breakout board. But with some patience, gentle prying, and a pair of needle-nose pliers, I got the old wires cleared and the new hotend bolted on.
(Pro-tip: If you ever replace yours, the heatsink fan label needs to face in toward the metal fins so it blows cool air directly onto the block!)
With the hardware rebuilt, it was time to address the root causes of the original failure so I didn’t repeat history.
Lessons Learned: How I Fixed the Print
To get 220 tiny parts printed with zero margin for error, I completely overhauled my printing environment and slicer settings:
1. Relocating to the Indoors
Originally, I was running the printer inside an enclosure in the garage. While enclosures are great for drafty spaces, they act like ovens for PLA. The trapped heat kept the plastic soft and malleable for too long, causing the thin edges of the bows to curl upward. I moved the printer inside the house and ran it in ambient room temperature so the PLA could snap-cool properly.
2. The Kitchen Sink Treatment (Ditch the IPA)
Isopropyl alcohol is fine for quick wipes, but it often just spreads skin oils around on a textured PEI bed. I took the build plate to the kitchen sink and gave it a thorough scrub with warm water and blue Dawn dish soap, drying it with a clean paper towel. The difference in adhesion was night and day. Once the plate was properly degreased, I didn’t even need to use glue stick—the PLA bonded perfectly to the textured plate on its own.
3. Slicer Tweaks for Micro-Adhesion
To give the tiny bows the best possible foundation, I adjusted my slicer settings:
- Layer Height: Bumped up from a microscopic 0.10 mm to a sturdier 0.20 mm. This doubled my mechanical “squish” on the first layer and left more clearance for the nozzle to pass over completed areas.
- Speed: Dropped the initial layer speed down to a crawl at 20 mm/s.
- Brim: Configured a generous brim to act as a physical anchor for each tiny piece.
- Fan Control: Kept the cooling fan off until layer 4 to prevent early thermal warping.
Crossing the Finish Line
With the settings dialed in, I started printing the five required sheets of 44.
Out of the entire frantic run, I had only one failure—occurring about 2 hours into a 3-hour and 44-minute print. Fortunately, I happened to be in the room, heard the distinct thud of the print head striking a slightly lifted part, and managed to hit stop before a second blob of death could form.
I cleaned the bed, restarted, and successfully pushed through the rest of the batch. The very last sheet finished printing last night, and the crafts were ready to go first thing this morning.
Crisis averted, lessons learned, and 220 Girl Scouts are going to have swaps from the Archery unit!